Posted
Filed under JSP, JAVA
utf-8로 개발 하게 되면 별도의 한글처리 필터를 사용 할 필요 없다.
문제는 get방식으로 파라메터를 전달 해야 할경우가 생기면 아래 와 같이 처리 한다.

jsp 에서는 get방식이든 post방식이든 한글로된 파라미터 값을 넘겨줄때 그냥 주면 한글이 깨진다.
ajax가 파라미터를 utf-8로 전송하기때문인데 해결방법은
파라미터를 보낼 자바스크립트에서

escape(encodeURIComponent('한글'));

이렇게 인코딩을 하고
요청처리될 액션 페이지에서

URLDecoder.decode(request.getParameter("searchText"), "UTF-8");
이렇게 받으면된다.

===============================================================

escape, encodeURIComponent 둘중에 하나만 사용하려하면 한글이 깨져서 사용할 수 가 없다.

영어만 기억하는 더러운 세상

response.setHeader("Content-Type", "application/octet-stream; charset=euc-kr");

response.setHeader ("Content-Disposition", "attachment; filename="+URLEncoder.encode(fname,"UTF-8")+";");

이렇게 하면 한글파일 다운로드시 안깨진 파일명을 볼 수 있다.
2010/09/01 16:06 2010/09/01 16:06
Posted
Filed under JSP, JAVA

원본 : http://bioportal.weizmann.ac.il/course/prog2/tutorial/java/javaOO/annotations.html

JDK 5.0
릴리즈에는 어노테이션(annotation)이라 불리는 메타데이터 기능이 도입되었다. 어노테이션은 코드 조각의 작성자 명이나 컴파일러가 특정 오류를 억제하도록 지시하는 것과 같이 프로그램의 일부가 아닌 프로그램에 관한 데이터를 제공해 준다. 어노테이션은 코드가 어떻게 수행되는 것에는 아무런 영향을 주지 않는다.

어노테이션은 @어노테이션 형태를 사용하고 클래스, 필드, 메소드 등과 같은 프로그램의 선언부에 적용할 있다. 어노테이션은 가장 처음으로 그리고 종종(관례상) 그 줄에 나타나며 임의의 인수를 포함할 있다:

        @Author("MyName")

        class myClass() { }

혹은

        @SuppressWarnings("unchecked")

        void MyMethod() { }


여러분만의
어노테이션을 정의하는 것은 여기에 기술되지 않을 고급기법에 속하지만, 모든 자바 프로그래머들이 알아야 하는 3개의 내장 어노테이션이 있다: @Deprecated, @Override, 그리고 @SuppressWarnings 그것이다. 다음 예제들은 메소드에 적용된 모든 가지 타입의 어노테이션을 보여준다:

import java.util.List;


class Food {}

class Hay extends Food {}

class Animal {

    Food getPreferredFood() {

        return null;

    }

    /**

     * @deprecated document why the method was deprecated

     */

    @Deprecated

    static void deprecatedMethod() { }

}

class Horse extends Animal {

    Horse() {

        return;

    }

    @Override

    Hay getPreferredFood() {

        return new Hay();

    }

    @SuppressWarnings("deprecation")

    void useDeprecatedMethod() {

        Animal.deprecateMethod(); //deprecation warning - suppressed

    }

}


@Deprecated

@Deprecated 어노테이션은 표시된 메소드가 이상 사용되지 말아야 함을 가리킨다. 컴파일러는 프로그램이 비추천(deprecated) 메소드나 클래스 혹은 변수를 사용할 때마다 경고를 발생시킨다. 요소가 비추천되면 그것은 앞의 예제에 나타나 있는 것처럼 해당되는 @deprecated 태그를 사용하여 문서화 되어야 한다. 태그는 소문자 ‘d’ 시작하며 어노테이션은 대문자 ‘D’ 시작함을 주의하라. 일반적으로 여러분은 비추천 메소드의 사용을 피해야 하며 그것 대신 무엇을 사용해야 하는지를 확인해야 한다.


@Override

@Override 어노테이션은 요소가 상위 클래스에서 선언된 요소를 오버라이드 것임을 컴파일러에게 알려준다. 앞의 예제에서는 오버라이드 어노테이션이 Horse 클래스의 getPreferredFood 메소드 Animal 클래스에 있는 동일한 메소드를 오버라이드하고 있음을 가리키는 사용되었다. @Override 표시된 메소드가 상위 클래스에 있는 메소드를 오버라이드하는 실패할 경우 컴파일러는 에러를 발생시킨다.


메소드를
오버라이드 어노테이션을 사용하도록 요구되는 것은 아니기 때문에 특히 메소드가 오버라이드된 메소드의 리턴 타입의 하위 타입을 리턴할 명시적으로 그것을 드러내도록 요구하는 것이 유용할 있다. 이러한 관례는 공변 리턴 타입(covariant return type)이라 불리는데, 이전의 Food 인스턴스를 리턴하는 Animal.getPreferredFood 예제에서 사용되었다. Horse.getPreferredFood (Horse Animal 하위클래스) Hay 인스턴스를 리턴한다. 자세한 정보를 위해서는 Overriding and Hiding Methods 참조하라.


@SuppressWarnings

@SuppressWarnings 어노테이션은 컴파일러가 다르게 발생될 특정 경고를 억제하도록 해준다. 이전의 예제에서 useDeprecatedMethod Animal 비추천 메소드를 호출한다. 보통 컴파일러는 경고를 발생시킬테지만, 경우에는 그것이 억제된다.

모든 컴파일러 경고는 종류에 속한다. 자바 언어 명세(Java Language Specification) 비추천(deprecation)” 비확인(unchecked)” 가지 종류를 나열한다. “비확인경고는 제네릭이 나오기 전에 작성된 레거시 코드와 인터페이싱할 경우에 발생할 있다. 하나 이상의 경고 종류를 억제하려면 다음의 문법을 사용하라.

@SuppressWarnings({"unchecked", "deprecation"})

지원되는 경고 종류들의 목록을 보려면 컴파일러 문서를 확인하라.


어노테이션을
고급스럽게 사용하는 것에는 자바 프로그램을 읽어 그것의 어노테이션을 처리할 있는 프로그램을 작성하는 것이 포함되어 있다. 작업을 돕기 위해, JDK 5.0 릴리즈에는 apt 불리는 어노테이션 처리도구(annotation processing tool) 포함되어 있다. 다음의 JDK 릴리즈(코드네임 머스탱)에는 apt 기능이 자바 컴파일러의 표준 요소가 것이다. 자세한 정보를 보려면 Getting Started with the Annotation Processing Tool 참조하라. 머스탱의 진척사항에 관한 자세한 정보를 원한다면 Language Model API JSR 269: Pluggable Annotation Processing API 참고하라.

2010/06/14 17:58 2010/06/14 17:58
Posted
Filed under JSP, JAVA
[원문] - http://okjsp.tistory.com/1165643255

자바 설치한 디렉토리를 기억합니다. 복사하면 좋구요.
예를 들면
C:\java\jdk1.6.0_04

내 컴퓨터 클릭하고 alt+Enter를 누르면 속성창이 뜹니다.
거기서 "고급" 탭을 클릭하고 하단의 "환경 변수" 버튼을 클릭 합니다.

사용자와 시스템이 상하로 나오는데,
시스템 쪽에 하는 것이 좋습니다.
새로 만드는 환경변수는 "JAVA_HOME" 입니다.
아까 복사한 자바 디렉토리를 아래 붙여 놓습니다.
사용자 삽입 이미지

그리고 하나 더 손 봐야 됩니다.
시스템 쪽에 Path 환경변수가 보입니다.

이것 열고 Home 키를 눌러서 맨 앞으로 가서
%JAVA_HOME%\bin;
을 추가합니다.

확인은 말이죠.
cmd 창 띄우고, 까만 화면에서
echo %Path%
하면 됩니다.

그리고
java -version
하면 버전도 보이죠.
2010/03/22 15:47 2010/03/22 15:47
Posted
Filed under JSP, JAVA
[원문] - http://mwultong.blogspot.com/2006/11/java-mathrandom-int.html
Random 클래스 없이, 간단히 정수 난수 구하기 예제
public class Foo {
  public static void main(String[] args) {


    // 0.0 ~ 1.0 사이의 실수 난수 구하기
    for (int i = 1; i <= 20; i++)
      System.out.println(Math.random());

/* 출력 결과:
0.8835488755737285
0.7442235907969202
0.04143887519495115
0.7752670113987891
0.525644276817284
0.9810655979902362
0.9857864655525691
0.5176456441171947
0.9534154184106848
0.5711598917262706
0.9167881479510426
0.9683895991289863
0.5570482364156645
0.640266931881892
0.7521635329694171
0.37944742406283405
0.1930044225804538
0.6713601888567906
0.28656122448550325
0.9697966362643208
*/


    // 1 ~ 10 까지의 정수 난수 구하기
    for (int i = 1; i <= 20; i++) {
      int n = (int) (Math.random() * 10) + 1;
      System.out.println(n);
    }

/* 출력 결과:
8
4
2
2
7
1
3
7
10
3
7
2
10
8
3
5
4
10
4
1
*/


  }
}
2010/03/11 19:08 2010/03/11 19:08
Posted
Filed under JSP, JAVA

[원문] - http://www.roseindia.net/struts/strutsfileupload.shtml

application. This interface represents a file that has been uploaded by a client. It is the only interface or class in upload package which is typically referenced directly by a Struts application.

Creating Form Bean

Our form bean class contains only one property theFile,  which is of type org.apache.struts.upload.FormFile

package roseindia.net;


import org.apache.struts.action.*;
import org.apache.struts.upload.FormFile;


/**
* @author Deepak Kumar
* @Web http://www.roseindia.net
* @Email roseindia_net@yahoo.com
*/

/**
 * Form bean for Struts File Upload.
 *
*/
public class StrutsUploadForm extends ActionForm
{
  private FormFile theFile;

  /**
   * @return Returns the theFile.
   */
  public FormFile getTheFile() {
    return theFile;
  }
  /**
   * @param theFile The FormFile to set.
   */
  public void setTheFile(FormFile theFile) {
    this.theFile = theFile;
  }
}

Creating Action Class

Our action class simply calls the getTheFile() function on the FormBean object to retrieve the reference of the uploaded file. Then the reference of the FormFile is used to get the uploaded file and its information. Here is the code of our action class(StrutsUploadAction.java):

package roseindia.net;

import javax.servlet.http.HttpServletRequest;
import javax.servlet.http.HttpServletResponse;

import org.apache.struts.action.Action;
import org.apache.struts.action.ActionForm;
import org.apache.struts.action.ActionForward;
import org.apache.struts.action.ActionMapping;
import org.apache.struts.upload.FormFile;
/**
* @author Deepak Kumar
* @Web http://www.roseindia.net
* @Email roseindia_net@yahoo.com
*/

/**
 * Struts File Upload Action Form.
 *
*/
public class StrutsUploadAction extends Action
{
  public ActionForward execute(
    ActionMapping mapping,
    ActionForm form,
    HttpServletRequest request,
    HttpServletResponse response) throws Exception{
    StrutsUploadForm myForm = (StrutsUploadForm)form;

        // Process the FormFile
        FormFile myFile = myForm.getTheFile();
        String contentType = myFile.getContentType();
        String fileName    = myFile.getFileName();
        int fileSize       = myFile.getFileSize();
        byte[] fileData    = myFile.getFileData();
    System.out.println("contentType: " + contentType);
    System.out.println("File Name: " + fileName);
    System.out.println("File Size: " + fileSize);
   
      return mapping.findForward("success");
  }
}

Defining form Bean in struts-config.xml file

Add the following entry in the struts-config.xml file for defining the form bean:

<form-bean
    name="FileUpload"
    type="roseindia.net.StrutsUploadForm"/>

Defining Action Mapping

Add the following action mapping entry in the struts-config.xml file:

<action
     path="/FileUpload"
     type="roseindia.net.StrutsUploadAction"
     name="FileUpload"
     scope="request"
     validate="true"
     input="/pages/FileUpload.jsp">
     <forward name="success" path="/pages/uploadsuccess.jsp"/>
</action>

Developing jsp page

Code of the jsp (FileUpload.jsp) file to upload is as follows:

<%@ taglib uri="/tags/struts-bean" prefix="bean" %>
<%@ taglib uri="/tags/struts-html" prefix="html" %>

<html:html locale="true">
<head>
<title>Struts File Upload Example</title>
<html:base/>
</head>
<body bgcolor="white">
<html:form action="/FileUpload" method="post" enctype="multipart/form-data">
<table>
<tr>
<td align="center" colspan="2">
<font size="4">Please Enter the Following Details</font>
</tr>

<tr>
<td align="left" colspan="2">
<font color="red"><html:errors/></font>
</tr>


<tr>
<td align="right">
File Name
</td>
<td align="left">
<html:file property="theFile"/>
</td>
</tr>


<tr>
<td align="center" colspan="2">
<html:submit>Upload File</html:submit>
</td>
</tr>
</table>


</html:form>
</body>
</html:html>

Note that we are setting the encrypt property of the form to enctype="multipart/form-data".

code for the success page (uploadsuccess.jsp) is:

<html>

<head>
<title>Success</title>
</head>

<body>

<p align="center"><font size="5" color="#000080">File Successfully Received</font></p>

</body>

</html>

Add the following line in the index.jsp to call the form.

<li>
<html:link page="/pages/FileUpload.jsp">Struts File Upload</html:link>
<br>
Example shows you how to Upload File with Struts.
</li>

Building Example and Testing

To build and deploy the application go to Struts\strutstutorial directory and type ant on the command prompt. This will deploy the application. Open the browser and navigate to the FileUpload.jsp page. Your browser should display the file upload form:
  

2010/03/08 19:29 2010/03/08 19:29
Posted
Filed under JSP, JAVA

원문 http://blog.naver.com/seogi1004/110069083184

더 좋은 방법이 있는지는 모르겠다.
일단 삽질한 거니 기록으로 남겨둔다.

아무튼... 먼저 Fancy URL 이란?

/board.html?action=list&page=2 이런 일반적인 URL 형식 대신
/board/list/2 이런 형식의 확장자가 없고 쿼리 스트링이 없는 간단한 URL을 말한다.
(fancy url의 정확한 뜻은 모르지만 나는 이렇게 이해하고 있다)

태터툴즈의 /tt/tags/태터툴즈 (태터툴즈란 태그가 있는 글목록을 출력하는 url) 이런걸 생각하면 된다.


가장 간단한 방법은 Apache의 mod_rewrite 모듈을 사용하면 된다.
하지만 이 경우는 아파치가 없거나 있어도 mod_rewrite 모듈 사용이 불가능한 걸 가정했다.

확장자가 없는 매핑이라도 특별한 패턴이 있으면 간단하게 할 수 있다. 예를 들면

/board/list
/board/view
/board/write

이런 매핑을 처리하려면 다음처럼 하면 된다.

   <servlet-mapping>
       <servlet-name>lucy</servlet-name>
       <url-pattern>/board/*</url-pattern>
   </servlet-mapping>

하지만

/list
/view
/write

이런걸 매핑하려면?

   <servlet-mapping>
       <servlet-name>lucy</servlet-name>
       <url-pattern>/list</url-pattern>
   </servlet-mapping>
   <servlet-mapping>
       <servlet-name>lucy</servlet-name>
       <url-pattern>/view</url-pattern>
   </servlet-mapping>
   <servlet-mapping>
       <servlet-name>lucy</servlet-name>
       <url-pattern>/write</url-pattern>
   </servlet-mapping>

특별한 패턴이 없는 url이기 때문에 전부다 매핑해 줘야 한다.
이건 세개뿐이니까 그렇지 매번 늘어날 때마다 매핑해 줄수도 없다.
특히 어떤 url로 요청이 들어올지 미리 알 수 없는 경우는 난감하다.
예를 들면 /(username) 했을 경우 해당 사용자의 정보를 보여준다든지 하는 것


아무튼 글의 요점은 확장자가 없는 모든 요청을 dispatcher가 받도록 하고 싶다는 거다.
내가 알기로는... 현재의 servlet-mapping은... 아래와 같은 식이나

   <servlet-mapping>
       <servlet-name>lucy</servlet-name>
       <url-pattern>/*</url-pattern> <!-- 모든 요청을 처리하되 -->
      <url-pattern-exclude>*.*</url-pattern-exclude> <!-- 확장자 '.' 이 들어가면 안돼 -->
  </servlet-mapping>

또는 아래와 같은 형식으로는...

   <servlet-mapping>
       <servlet-name>lucy</servlet-name>
       <url-pattern>^/([^.]*)$</url-pattern> <!-- . 이 포함되지 않은 패턴 -->
  </servlet-mapping>

이렇게는 지원이 안되기 때문에;;; 조금 편법을 써야 했다.


일단 매핑은 아래처럼...

   <servlet-mapping>
       <servlet-name>lucy</servlet-name>
       <url-pattern>/app/*</url-pattern>
  </servlet-mapping>


이렇게 해당 /app/로 시작하는 모든 요청에 대해 처리하도록 한다.


근데 이것도 맘에 안 드는게 확장자 없이 매핑하는건 되지만
url을 항상 /app/로 요청해야 한다.
그다지 의미있는 url은 아닌데 항상 따라다니는 것도 보기 안좋고...


appfuse에서 발견한... urlrewrite filter를 사용한다.
(appfuse에서는 이런 목적으로 쓰진 않았지만...)


https://urlrewrite.dev.java.net/ 에서 urlrewrite filter 3.0 을 받아 lib 폴더에 넣는다.

/WEB-INF/urlrewrite.xml 을 작성


<?xml version="1.0" encoding="UTF-8"?>
<!DOCTYPE urlrewrite PUBLIC "-//tuckey.org//DTD UrlRewrite 3.0//EN" "http://tuckey.org/res/dtds/urlrewrite3.0.dtd">

<!-- https://urlrewrite.dev.java.net/manual/3.0 -->

<urlrewrite>

   <rule>
       <note>
           확장자가 없는 요청은 /app/* 요청이다.
           ex) /user/register -> /app/user/register
       </note>
       <from>^/([^.]*)$</from>
       <to type="forward">/app/$1</to>
   </rule>

</urlrewrite>


web.xml 에 url rewrite filter 등록


   <filter>
       <filter-name>urlRewriteFilter</filter-name>
       <filter-class>org.tuckey.web.filters.urlrewrite.UrlRewriteFilter</filter-class>
       <init-param>
           <param-name>logLevel</param-name>
           <param-value>commons</param-value>
       </init-param>
   </filter>


   <filter-mapping>
       <filter-name>urlRewriteFilter</filter-name>
       <url-pattern>/*</url-pattern>
   </filter-mapping>


Spring Context XML 파일에서...

   <bean id="userMappings" class="org.springframework.web.servlet.handler.SimpleUrlHandlerMapping">
       <property name="mappings">
           <map>
               <entry key="/user/register" value-ref="userRegisterController"/>
               <entry key="/user/login" value-ref="userLoginController"/>
           </map>
       </property>


앞에 /app를 붙여 주지 않아도 된다... 물론 브라우저에서 요청시에도 /app를 안 붙여도 되고...


내가 썼는데도 무슨 말인지 모르겠네...
일단 써두기만 하고 정리는 나중에 -_-;;;

http://steelheart.kr/tc/32

레이어 닫기

이 저작물은 아래 조건 만족 시
별도 허가 없이 사용 가능합니다

  • 저작자 명시 필수
  • 영리적 사용 불가
  • 내용 변경 불가
2010/03/02 21:27 2010/03/02 21:27
Posted
Filed under JSP, JAVA
[원문]http://blog.kfmes.com/137


public static String escape(String string){
       StringBuffer sb = new StringBuffer();
       String ncStr = "*+-./0123456789@ABCDEFGHIJKLMNOPQRSTUVWXYZ_abcdefghijklmnopqrstuvwxyz";
       char c;
       
       for(int i=0;i<string.length();i++){
              c = string.charAt(i);
              if(c>0x7f){
                     sb.append("%u");
                     sb.append(Integer.toHexString((int)c).toUpperCase());
              }
              else if(ncStr.indexOf((int)c)==-1){
                     sb.append('%');
                     if(c<=0xf)
                            sb.append('0');
                     sb.append(Integer.toHexString((int)c).toUpperCase());
              }
              else
                     sb.append(c);
       }
       
       return sb.toString();
}
2010/03/02 20:52 2010/03/02 20:52
Posted
Filed under JSP, JAVA
[원문]http://blog.naver.com/dnms5/50031076855

sp 에서는 get방식이든 post방식이든 한글로된 파라미터 값을 넘겨줄때 그냥 주면 한글이 깨진다.
ajax가 파라미터를 utf-8로 전송하기때문인데 해결방법은

파라미터를 보낼 자바스크립트에서
escape(encodeURIComponent('한글'));
이렇게 인코딩을 하고

요청처리될 액션 페이지에서
URLDecoder.decode(request.getParameter("searchText"), "UTF-8");
이렇게 받으면된다.

2010/03/02 10:07 2010/03/02 10:07
Posted
Filed under JSP, JAVA

[원문]http://blog.naver.com/neofanta/120045663983

FCK Editor v2.4.3


복사만으로 간단하게 설치가 되지만, 그대로는 사용할 수가 없다.

설치후에 기본적으로 설정해야 하는 것들을 정리해 본다.
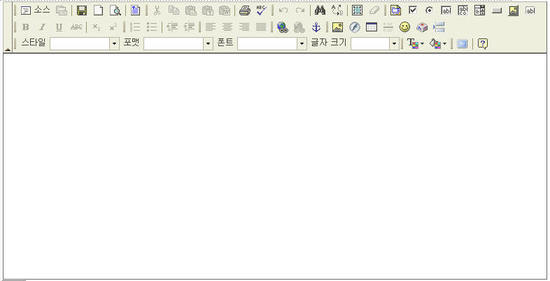


1. 환경 설정하기

fckeditor/fckconfig.js 파일에 필요한 대부분의 필요한 환경 설정을 할 수 있다.

먼저 기본으로 설정해야 할 환경에 대해서 알아본다.


서버스크립트별로 주석으로 표시되어 있는 부분을 해제 시켜준다.

FCKConfig.ProtectedSource.Add( /<%[\s\S]*?%>/g ) ; // ASP style server side code <%...%>


기본언어를 한글로 바꿔준다.

FCKConfig.DefaultLanguage  = 'kr' ;


편집중 엔터 또는 쉬프트+엔터에 대한 사입할 태그를 선택한다.

FCKConfig.EnterMode = 'div' ;   // p | div | br
FCKConfig.ShiftEnterMode = 'br' ; // p | div | br


링크 서버 보기 기능을 없애준다. 서버보기를 통해 불필요한 파일에 대한 업로드 방지와 보안의 일환으로 없애는 것이 좋다.

FCKConfig.LinkBrowser = false ;


이미지 서버 보기 기능을 없애준다.

FCKConfig.ImageBrowser = false ;


플래시 서버 보기 기능을 없애준다.

FCKConfig.FlashBrowser = false ;


여기까지는 보통 새 버전이 나올때마다 또는 새로 설치할 때마다 반드시 확인해줘야 하는 사항이다.

두번째로 종종 사용되는 기능에 대해 알아본다.


이모티콘을 추가해보자. 자신만의 이모티콘이 있다면 별도의 폴더에 저장하고 경로를 설정해준 다음 각각의 파일명을 등록하면 된다.

FCKConfig.SmileyPath = FCKConfig.BasePath + 'images/smiley/msn/' ;
FCKConfig.SmileyImages = ['regular_smile.gif','sad_smile.gif','wink_smile.gif','teeth_smile.gif','confused_smile.gif',

'tounge_smile.gif','embaressed_smile.gif','omg_smile.gif','whatchutalkingabout_smile.gif',

'angry_smile.gif','angel_smile.gif','shades_smile.gif','devil_smile.gif','cry_smile.gif','lightbulb.gif',

'thumbs_down.gif','thumbs_up.gif','heart.gif','broken_heart.gif','kiss.gif','envelope.gif'] ;


툴바를 내맘데로 바꿔보자.

FCKConfig.ToolbarSets["MyToolbar"] = [
 ['Bold','Italic','Underline','StrikeThrough','-','Subscript','Superscript'],
 ['OrderedList','UnorderedList','-','Outdent','Indent'],
 ['JustifyLeft','JustifyCenter','JustifyRight','JustifyFull'],
 ['Link','Unlink','Anchor'],['Image']
] ;
이렇게 별도로 추가한 다음에 fckeditor를 생성하는 스크립트에서는 아래처럼 지정해 주면 된다.

Dim oFCKeditor
Set oFCKeditor = New FCKeditor
oFCKeditor.ToolbarSet = "MyToolbar"
oFCKeditor.BasePath = "/fckeditor/"
oFCKeditor.Value = ""
oFCKeditor.Height = 400
oFCKeditor.Width = 780
oFCKeditor.Create "content"

2. 용량이 큰 이미지를 업로드 하기 위하여 설정할 사항

가끔 이미지가 크다 싶으면 업로드가 안되는 경우가 있다. 이것은 서버의 설정 문제이다.

아래 포스트에 자세한 내용이 있다.

http://blog.naver.com/neofanta.do?Redirect=Log&logNo=120039036389


3. 한글로된 이미지파일명을 제대로 업로드하고 보여주기

한글이 섞인 파일명으로된 이미지를 업로드하면 업로드는 되는데 표시가 안되고 엑스박스가 나오게 된다. 페이지 케릭터셋을 변경해주어 해결할 수 있다. 아래 굵은 글씨로 되어있는 부분을 추가한다.


fckeditor/editor/filemanager/upload/asp/upload.asp

<%@ CodePage=65001 Language="VBScript"%>
<%
Option Explicit
Response.Buffer = True
Response.CharSet = "UTF-8"


4. 이미지 업로드 경로를 변경하기

fckeditor/editor/filemanager/upload/asp/config.asp 파일에서 아래의 내용을 변경하면 원하는 곳에 저장할 수 있다.

ConfigUserFilesPath = "/files/fck/"


5. 이미지 주소 형태 변경하기

이미지를 업로드하게 되면 주소가 /files/fck/image.gif 처럼 전체 경로로 되어있지 않아서 사이트 내에서는 아무런 오류가 없지만, 만약 입력된 내용으로 이메일이라도 보내게 되면 이미지가 하나도 나오지 않게 된다.

이미지 태그가 아래처럼 만들어지기 때문이다.

<img src="/files/fck/image.gif">

그렇기 때문에 이미지가 어느 서버에 있는지 알수가 없어서 엑스박스로 나오게 된다. 이것은 이미지를 입력할때 해당 이미지의 전체 주소의 형태로 태그가 만들어지면 해결될수 있는 문제이다.

아래의 포스트에 자세한 내용이 있다.

http://blog.naver.com/neofanta.do?Redirect=Log&logNo=120045457520


6. 편집기 안의 툴바에서 폰트목록에 굴림, 돋움체 추가하기

/fckeditor/fckconfig.js 파일을 열자.

아래 내용으로 변경하고 더 원하는 폰트가 있으면 추가한다.

FCKConfig.FontNames  = '굴림;굴림체;돋움;돋움체;Arial;Comic Sans MS;Courier New;Tahoma;Times New Roman;Verdana' ;


위처럼 추가를 해도 처음 편집기안에 커서가 위치하게 되면 기본 폰트가 굴림이 아니라 Arial로 되어있다. 매번 변경할 필요 없이 스타일 파일의 기본 폰트를 변경하여 매번 폰트를 바꿔줘야 하는 불편함을 없앨 수 있다.

/fckeditor/editor/css/fck_editorarea.css

body, td
{
 font-family: Gulim, Arial, Verdana, Sans-Serif;
 font-size: 12px;
}

2010/02/18 21:46 2010/02/18 21:46