Posted
Filed under JSP, JAVA

[원문]http://blog.naver.com/neofanta/120045663983

FCK Editor v2.4.3


복사만으로 간단하게 설치가 되지만, 그대로는 사용할 수가 없다.

설치후에 기본적으로 설정해야 하는 것들을 정리해 본다.
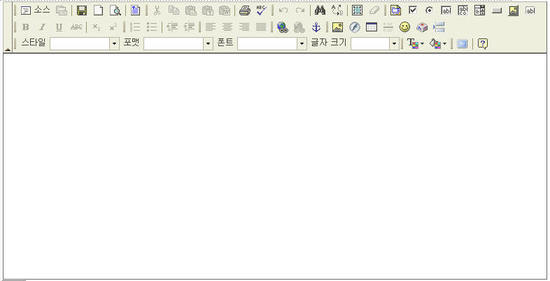


1. 환경 설정하기

fckeditor/fckconfig.js 파일에 필요한 대부분의 필요한 환경 설정을 할 수 있다.

먼저 기본으로 설정해야 할 환경에 대해서 알아본다.


서버스크립트별로 주석으로 표시되어 있는 부분을 해제 시켜준다.

FCKConfig.ProtectedSource.Add( /<%[\s\S]*?%>/g ) ; // ASP style server side code <%...%>


기본언어를 한글로 바꿔준다.

FCKConfig.DefaultLanguage  = 'kr' ;


편집중 엔터 또는 쉬프트+엔터에 대한 사입할 태그를 선택한다.

FCKConfig.EnterMode = 'div' ;   // p | div | br
FCKConfig.ShiftEnterMode = 'br' ; // p | div | br


링크 서버 보기 기능을 없애준다. 서버보기를 통해 불필요한 파일에 대한 업로드 방지와 보안의 일환으로 없애는 것이 좋다.

FCKConfig.LinkBrowser = false ;


이미지 서버 보기 기능을 없애준다.

FCKConfig.ImageBrowser = false ;


플래시 서버 보기 기능을 없애준다.

FCKConfig.FlashBrowser = false ;


여기까지는 보통 새 버전이 나올때마다 또는 새로 설치할 때마다 반드시 확인해줘야 하는 사항이다.

두번째로 종종 사용되는 기능에 대해 알아본다.


이모티콘을 추가해보자. 자신만의 이모티콘이 있다면 별도의 폴더에 저장하고 경로를 설정해준 다음 각각의 파일명을 등록하면 된다.

FCKConfig.SmileyPath = FCKConfig.BasePath + 'images/smiley/msn/' ;
FCKConfig.SmileyImages = ['regular_smile.gif','sad_smile.gif','wink_smile.gif','teeth_smile.gif','confused_smile.gif',

'tounge_smile.gif','embaressed_smile.gif','omg_smile.gif','whatchutalkingabout_smile.gif',

'angry_smile.gif','angel_smile.gif','shades_smile.gif','devil_smile.gif','cry_smile.gif','lightbulb.gif',

'thumbs_down.gif','thumbs_up.gif','heart.gif','broken_heart.gif','kiss.gif','envelope.gif'] ;


툴바를 내맘데로 바꿔보자.

FCKConfig.ToolbarSets["MyToolbar"] = [
 ['Bold','Italic','Underline','StrikeThrough','-','Subscript','Superscript'],
 ['OrderedList','UnorderedList','-','Outdent','Indent'],
 ['JustifyLeft','JustifyCenter','JustifyRight','JustifyFull'],
 ['Link','Unlink','Anchor'],['Image']
] ;
이렇게 별도로 추가한 다음에 fckeditor를 생성하는 스크립트에서는 아래처럼 지정해 주면 된다.

Dim oFCKeditor
Set oFCKeditor = New FCKeditor
oFCKeditor.ToolbarSet = "MyToolbar"
oFCKeditor.BasePath = "/fckeditor/"
oFCKeditor.Value = ""
oFCKeditor.Height = 400
oFCKeditor.Width = 780
oFCKeditor.Create "content"

2. 용량이 큰 이미지를 업로드 하기 위하여 설정할 사항

가끔 이미지가 크다 싶으면 업로드가 안되는 경우가 있다. 이것은 서버의 설정 문제이다.

아래 포스트에 자세한 내용이 있다.

http://blog.naver.com/neofanta.do?Redirect=Log&logNo=120039036389


3. 한글로된 이미지파일명을 제대로 업로드하고 보여주기

한글이 섞인 파일명으로된 이미지를 업로드하면 업로드는 되는데 표시가 안되고 엑스박스가 나오게 된다. 페이지 케릭터셋을 변경해주어 해결할 수 있다. 아래 굵은 글씨로 되어있는 부분을 추가한다.


fckeditor/editor/filemanager/upload/asp/upload.asp

<%@ CodePage=65001 Language="VBScript"%>
<%
Option Explicit
Response.Buffer = True
Response.CharSet = "UTF-8"


4. 이미지 업로드 경로를 변경하기

fckeditor/editor/filemanager/upload/asp/config.asp 파일에서 아래의 내용을 변경하면 원하는 곳에 저장할 수 있다.

ConfigUserFilesPath = "/files/fck/"


5. 이미지 주소 형태 변경하기

이미지를 업로드하게 되면 주소가 /files/fck/image.gif 처럼 전체 경로로 되어있지 않아서 사이트 내에서는 아무런 오류가 없지만, 만약 입력된 내용으로 이메일이라도 보내게 되면 이미지가 하나도 나오지 않게 된다.

이미지 태그가 아래처럼 만들어지기 때문이다.

<img src="/files/fck/image.gif">

그렇기 때문에 이미지가 어느 서버에 있는지 알수가 없어서 엑스박스로 나오게 된다. 이것은 이미지를 입력할때 해당 이미지의 전체 주소의 형태로 태그가 만들어지면 해결될수 있는 문제이다.

아래의 포스트에 자세한 내용이 있다.

http://blog.naver.com/neofanta.do?Redirect=Log&logNo=120045457520


6. 편집기 안의 툴바에서 폰트목록에 굴림, 돋움체 추가하기

/fckeditor/fckconfig.js 파일을 열자.

아래 내용으로 변경하고 더 원하는 폰트가 있으면 추가한다.

FCKConfig.FontNames  = '굴림;굴림체;돋움;돋움체;Arial;Comic Sans MS;Courier New;Tahoma;Times New Roman;Verdana' ;


위처럼 추가를 해도 처음 편집기안에 커서가 위치하게 되면 기본 폰트가 굴림이 아니라 Arial로 되어있다. 매번 변경할 필요 없이 스타일 파일의 기본 폰트를 변경하여 매번 폰트를 바꿔줘야 하는 불편함을 없앨 수 있다.

/fckeditor/editor/css/fck_editorarea.css

body, td
{
 font-family: Gulim, Arial, Verdana, Sans-Serif;
 font-size: 12px;
}

2010/02/18 21:46 2010/02/18 21:46
Posted
Filed under JSP, JAVA
[원문]http://blog.daum.net/_blog/hdn/ArticleContentsView.do?blogid=0Cnf6&articleno=16498176&looping=0&longOpen=

FCKeditor는 오픈 소스로서 웹 환경에서 html편집 기능을 제공 합니다...

1. 톰캣 환경에서 내가 만든 웹프로젝트 안에 FCKedit라는 폴더를 만듭니다.

2. fckeditor 다운로드
2-1. http://www.fckeditor.net/download/ 에서 다운로드
2-2. FCKedit 폴더에 다운로드 된 압축 파일의 압축을 풉니다.
      위의 URL에서 다운받은 것을 사용 하시면 추려낼것들이 좀 많습니다...
      하지만 추려 내지 않고 돌려도 잘 돌아 갑니다...

3.  java 버전용 fckeditor 를  다운로드(FCKeditor-2.3.zip)
3-1. http://sourceforge.net/project/showfiles.php?group_id=75348&package_id=129511 에서 다운로드합니다..
     다운로드 하였다면 압축을 풀고 , 하나 하나 옴겨 보죠...^^
3-2. 먼저 FCKeditor-2.3 의 web/WEB-INF/web.xml을 열어서 톰켓 환경의 web.xml에 추가합니다.
<servlet>
                <servlet-name>Connector</servlet-name>
                <servlet-class>com.fredck.FCKeditor.connector.ConnectorServlet</servlet-class>
               

......<중간 생략>......
 
  <servlet-mapping>
    <servlet-name>SimpleUploader</servlet-name>
    <url-pattern>/simpleuploader</url-pattern>
  </servlet-mapping>

3-3. 그리고 나서는 FCKeditor-2.3 /web/WEB-INF/lib에있는 commons-fileupload.jar파일을
       프로젝트의 WEB-INF/lib안에 복사 하고  빌드패스에 추가 하여 줍니다.
3-4. FCKeditor-2.3/src의 com폴더를 WEB-INF/src에 복사 합니다..
        이렇게 하면 기본적인 jsp에서 사용할수 있는 FCKeditor를 셋팅 됩니다.

기본 셋팅을 했으니까 jsp페이지를 만들어 보죠...
4-1. jsp페이지를 testfck.jsp로 만들도록 하겠습니다...
       페이지에서는

<%@ page   language="java" contentType="text/html;charset=euc-kr"%>
<%@ taglib uri="http://java.sun.com/jstl/core" prefix="c"%>


<html>
<head>
   
    <title>FCKeditor</title>

<link href="/css/style.css" rel="stylesheet" type="text/css">

<script language="javascript"  src="/js/message.js" type="text/javascript"></script>
<script type="text/javascript" src="/FCKedit/fckeditor.js"></script>
</head>

<script LANGUAGE="JavaScript"><!--
       
        /**
     * doInit()
     * 개     요 : 화면 로딩시 실행, 일반 textarea를 editor가 포함된 형태로 변형
     * return값 : void
     */
        function doInit() {
       
                var sBasePath = "/FCKedit/";
                oFCKeditor = new FCKeditor( 'FCKeditor' ) ;
                oFCKeditor.BasePath = sBasePath ;
                oFCKeditor.ReplaceTextarea();
        }
        
--></script>

<body style="background-color:transparent" onload="doInit();" oncontextmenu="return false" >
<form id=MsgForm name=MsgForm  method="post" style="width:100%;height:450;" target="myhiddenFrame">
<table id=totalTable width="100%" height="100%" border="0" cellspacing="0" cellpadding="0">
        <tr height="100%">
                <td class="td_C5" valign="top" height="100%">
                        <table width="100%" height="100%" border="0" cellspacing="0" cellpadding="0">    
                                <tr height="100%">
                                        <td height="100%" id=MSG>
                                                

                                                     <textarea id='FCKeditor' name='FCKeditor' style='width:100%;height:100%;'>
                                                             <c:forEach items="${sessionScope.HelpMsg}" var="it">
                                                                     <c:out value="${it.hlp_msg}"/>
                                                             </c:forEach>
                                                     </textarea>
                                               

                                        </td>
                                </tr>
                        </table>
                </td>
        </tr>
</table>
</form>

</html>

이렇게 구성 하면 jsp페이지 에서 FCKeditor를 볼수 있습니다...
설명을 한다고 했는데 ,, 잘 이해가 되실지 모르겠습니다.....
이글에 대한 궁금한점 리플 달아 주시면 성심 성의껏 답변 해드리겠습니다..

다음 글에서는 FCKeditor의 이미지 업로드에 관한 강좌를 올리도록 하겠습니다...

jsp에서 FCKeditor 사용하기 - 2

FCKeditor에대한 두번째 강좌 이네요..^^
이번 강좌는 편집 문서에 이미지를 넣기 위한 과정으로 좀 까다롭더군요..^^
이거 때문에 고생좀 했습니다..^^

이글을 보시고 FCKeditor를 사용하시는 분들은 고생을 덜하셨으면 합니다..^^

첯 강좌에 commons-fileupload.jar를 lib에 추가 하고, src에 com패키지를 추가 한것을 기억
하실 껍니다..
이 두녀석이 서버의 특정 루트에 파일을 업로드 하게끔 해주는 녀석 입니다..^^
그냥 디폴트로 사용한다면 컨텍스트 아래에 UserFile이라는 이름으로 폴더가 생성 됩니다..
업로드 제한 사이즈 또한 디폴트 용량이 1M안쪽인것 같습니다....
실제 디폴트 용량이 얼마 인지는 저두 확실히 파악하지는 못했습니다....
암튼 수정을 가하지 않고 쓸려니 파일 용량에서 걸리더군요..^^

com패키지 안을 열어 보시면 ConnectorServlet.java파일이 있습니다..
이녀석이 이미지를 업로드 할때 FCKeditor의 frmupload.html에서 녀석을 불러들이고,
ConnectorServlet.java파일 에서는 commons-fileupload.jar파일에 들어 있는 FileItem클래스를
이용하여 파일을 업로드 하게 됩니다..

**** 주의 ****
파일 업로드시 현재 자신이 사용하고 잇는 인코딩 방식을 잘 채크 하고 잇어야 합니다..
사용하는 인토딩 방식에 따라 한글파일 일 경우 파일명이 깨지는 현상이 발생 하기 때문입니다.
****************************************************************************************

ConnectorServlet.java파일에는 몇개의 함수가 존재 하는데..
함수에 대해 잠시 알아 보죠..
init();
서블릿이 구동될때 실행 됩니다.
web.xml에서 폴더명을 가지고 와서 컨택스트폴더 아래에 파일이 업로드될 폴더를 만듭니다.
web.xml에서 폴더명을 얻지 못하였다면 디폴트로 정의된 UserFile이라는 폴더를 생성 합니다.

doGet(HttpServletRequest request, HttpServletResponse response);
UserFile폴더에 들어 잇는 파일명을 읽어 옵니다..
이미지 설정 다이얼로그에서 서버 보기버튼을 누를 때 (browser.html)이 실행되면서 호출 됩니다.
한글 파일의 경우 인코딩 주의

doPost(HttpServletRequest request, HttpServletResponse response);
FCKeditor에서 서버에 전송할때 실제 업로드를 하는 함수 입니다.
이 함수에서 파일 업로드 최대 사이즈 업로드 버퍼 용량등을 조절 가능 합니다.
frmupload.html에서 파일을 선택후 업로드 버튼을 누를때 실행 됩니다.
한글파일의경우 인코딩 주의

getFolders(File dir,Node root,Document doc);
폴더명을 읽어 옵니다.

getFiles(File dir,Node root,Document doc);
파일명을 읽어옵니다.


web.xml을 수정 하고 나면
컨텍스트에 맞게끔 경로 수정이 필요 합니다...

fckconfig.js에서  파일 업로드 경로를 설정 할수있습니다..

web.xml 의
<servlet-mapping>
<servlet-name>Connector</servlet-name>
<url-pattern>/editor/filemanager/browser/default/connectors/jsp/connector</url-pattern>
</servlet-mapping>
<servlet-mapping>
<servlet-name>SimpleUploader</servlet-name>
<url-pattern>/editor/filemanager/upload/simpleuploader</url-pattern>
</servlet-mapping>  

위 url-pattern 경로대로 Connector 부분과 UploadURL 을 현재 경로를 재구성해도 되지만
경로를 저리 길게 잡을 필요는 없어서 저는 아래와 같이 xml을 수정 하였습니다

<servlet-mapping>
<servlet-name>Connector</servlet-name>
<url-pattern>/connector</url-pattern>
</servlet-mapping>
<servlet-mapping>
<servlet-name>SimpleUploader</servlet-name>
<url-pattern>/simpleuploader</url-pattern>
</servlet-mapping>  

그리고는 fckconfig.js에서 url설정 부분을 아래와 같이 변경 합니다...

FCKConfig.LinkBrowserURL = FCKConfig.BasePath + 'filemanager/browser/default/browser.html?Connector=/danpum/connector' ;

FCKConfig.ImageBrowserURL = FCKConfig.BasePath + 'filemanager/browser/default/browser.html?Type=Image&Connector=/danpum/connector' ;

FCKConfig.FlashBrowserURL = FCKConfig.BasePath + 'filemanager/browser/default/browser.html?Type=Flash&Connector=/danpum/connector' ;

FCKConfig.LinkUploadURL = FCKConfig.BasePath + 'simpleuploader?Type=File' ;

FCKConfig.ImageUploadURL = FCKConfig.BasePath + 'simpleuploader?Type=Image' ;

FCKConfig.FlashUploadURL = FCKConfig.BasePath + 'simpleuploader?Type=Flash';


그러면 이미지 업로드 설정은 끝이 납니다,....^^
위와 같이 설정 하면, UserFile이라는 폴더가 컨택스트 폴더 아래에  생성 되고 ,
UserFile/image라는 폴더가 생성 되어 image폴더 안에 파일을 업로드 할수 있습니다.  

설치방법 2

[원문]http://pskppoppo.egloos.com/2771426

현재 개발환경은 eclipse 3.5, jdk 1.6, Tomcat 6.0 버전대이다.

기존 개발시 사용하던 FCKeditor_2.3.2 버전과 세팅방법이 확연히 다르다.

우선 아래의 파일두개를 다운로드한다.

FCKeditor_2.6.5.zip 이건 2.6버전 압축파일, fckeditor-java-demo-2.5.war 이건 필요한 라이브러리들이있는 데모 war 파일

우선 FCKeditor_2.6.5 압축을 푼다.


기존 2.3버전대랑 디렉토리 구조가 다르다. 2.3버전대에서는 바로 /editor/fckeditor.html 이 존재했지만, 2.6버전대에서는 /fckeditor/editor/fckeditor.html 로 서로 경로가 달랐다.

그리고 2.3버전대에서는 Tomcat 디렉토리안에 압축을 푼후 server.xml 에 아래와 같이 context를 잡아주면 되었다.
<Context docBase="D:/dev/was/apache-tomcat-6.0.16/webapps/FCKeditor_2.3.2" path="/FCKeditor" reloadable="true"/>

이러면 jsp안에서 <%@ taglib uri="http://fckeditor.net/tags-fckeditor" prefix="FCK" %> 이런식으로 선언을 하고 쓸수 있었다.

문제는 2.6버전 일단 2.6버전의 압축파일을 풀어보면 알겠지만 WEB-INF 디렉토리가 없다. 다시말하면 배포된 파일이 아니란 사실이다.

우선 2.6버전을 압축을 풀고 fckeditor 디렉토리를 WebContent 로 복사한다.


그러면 위와같은 구조가 되겠지? 그런다음 위에있는 fckeditor-java-demo-2.5.war 파일의 압축을 풀어 WEB-INF/lib 폴더에 들어가 아래 파일들을 모두 복사한다.
commons-fileupload-1.2.1.jar
commons-io-1.3.2.jar
imageinfo-1.9.jar
java-core-2.5.jar
slf4j-api-1.5.8.jar
slf4j-simple-1.5.8.jar

그리고 Tomcat 설치경로 lib 폴더에 붙여넣는다.

다음으로 src 디렉토리에 fckeditor.properties 파일을 만들어 줘야한다.


fckeditor.properties

그리고 WebContent/WEB-INF/web.xml 에 FCKeditor 부분을 추가해줘야한다.
<display-name>FCKeditor</display-name>
<description>FCKeditor</description>

    <servlet>
        <servlet-name>
ConnectorServlet</servlet-name>
        <servlet-class>net.fckeditor.connector.ConnectorServlet</servlet-class>
        <load-on-startup>1</load-on-startup>
    </servlet>

    <servlet-mapping>
        <servlet-name>
ConnectorServlet</servlet-name>
   <!-- Do not wrap this line otherwise Glassfish will fail to load this file -->
        <url-pattern>/fckeditor/editor/filemanager/connectors/*</url-pattern>
   </servlet-mapping>

솔까 위에 주석부분은 뭘 뜻하는지 정확히 모르겠음. 이제 완료되었으면 사용할 jsp 단에서 tablib 부분을 선언해줘야한다.

기존 <%@ taglib uri="http://fckeditor.net/tags-fckeditor" prefix="FCK" %> 이렇게 된것을
 
이렇게 말이다. <%@ taglib prefix="FCK" uri="http://java.fckeditor.net" %>

이렇게 하면 Tomcat의 server.xml 에서 설정했던 FCKeditor 관련 Context는 필요가 없어진다.


2010/02/18 18:50 2010/02/18 18:50
Posted
Filed under JSP, JAVA

n order to specify the scope, you preceed your variable with the scope
type.  Therefore for a request-scope variable, the variable would be :
"requestScope.variable".  There are several scope types:

  pageScope
  requestScope
  sessionScope
  applicationScope

Additionally, when you have multiple c:if tags that test different
conditions of the same variable, I would suggest rewriting the block as
follows:

<c:choose>
  <c:when test="${requestScope.mode=='a'}">
    first thing
  </c:when>
  <c:when test="${requestScope.mode=='b'}">
    second thing
  </c:when>
  <c:otherwise>
    a catch all section
  </c:otherwise>
</c:choose>

Consider the above more like a switch or if/elseif combo rather than
multiple if statements.

2010/02/18 13:49 2010/02/18 13:49
Posted
Filed under JSP, JAVA

게시판을 구현중 skin 디렉토리의 폴더 목록을 뽑아 와서 Select box에 보여줘야 될 경우가
발생 했다.
이것 저것 테스트 해본 결과..

org.apache.struts.util.LabelValueBean  을 이용하여 lavel, value값으로 ArrayList에 넣고
iterate  시켰다..

-천천히 보면 누구나 이해 할 수 있음 ... 더 좋은 방법이 있다면..
scormrte@gmail.com 이나 뎃글로 ... 조언 부탁 드립니다.

간단 한 예로
 - action
ArrayList skinList = futil.getDirectoryList(skin_path);
   skinList = ConvertLableValueBean.convert_from_ArrayList(skinList);
   request.setAttribute("skinList",skinList);


-jsp page
<select name="bcf_skin">
      <logic:iterate name="skinList" type="org.apache.struts.util.LabelValueBean" id="skin_vo">
       <option value="test"><bean:write name="skin_vo" property="value" /></option>
      </logic:iterate>
     </select>


-사용자 정의 클레스
import org.apache.struts.util.LabelValueBean;
import java.util.ArrayList;
import java.util.List;

public class ConvertLableValueBean {
 public static ArrayList convert_from_ArrayList(ArrayList targetList){
  ArrayList list = new ArrayList();
  for(int i=0; i<targetList.size(); i++){
   list.add(new LabelValueBean( targetList.get(i).toString(), targetList.get(i).toString() ));
  }
  return (ArrayList)list;
 }
 
 public static ArrayList convert_from_ArrayList(ArrayList LabelList, ArrayList LabelValue){
  ArrayList list = new ArrayList();
 
  for(int i=0; i<LabelList.size(); i++){
   list.add(new LabelValueBean( LabelList.get(i).toString(), LabelValue.get(i).toString() ));
  }
 
  return (ArrayList)list;
 }
 
}


-----------------------------------------------------------------------------------


import java.io.File;
import java.io.FileFilter;
import java.io.FilenameFilter;
import java.util.ArrayList;
public class FileUtil {
 
 private ArrayList list=null;
 private File dir;
 private File[] dirlist;
 
 public FileUtil(){
  list = new ArrayList();
 }
 
 //directory filter
 private FileFilter getDirectoryFilter(){
  FileFilter fileFilter = new FileFilter() {
      public boolean accept(File file) {
          return file.isDirectory();
      }
  };
  return fileFilter;
 }
 
 //file filter
 private FilenameFilter getFileFilter(){
  FilenameFilter filter = new FilenameFilter() {
      public boolean accept(File dir, String name) {
          return !name.startsWith(".");
      }
  };
  return filter;
 }
 
 
 public ArrayList getdirlist(String path){
  dir = new File(path);
  conv_fileArry_to_list(dir.listFiles(getFileFilter()));
  return list;
 }
 
 public ArrayList getDirectoryList(String path){
  dir = new File(path);
  conv_fileArry_to_list(dir.listFiles(getDirectoryFilter()));
  return list;
 }
 
 private void conv_fileArry_to_list(File[] dirlist){
  this.list.clear();
  for (File flist : dirlist){
   this.list.add(flist.getName());
  }
 }
}

2010/02/16 23:06 2010/02/16 23:06
Posted
Filed under JSP, JAVA

파일을 실제로 업로드 하기 위해서는 업로드할 디렉토리의 실제 주소를 구해야 한다.
request.getRealPath("/path") <-- path는 경로를 적어 주면 된다 .
ex)
private String skin_path="";
skin_path = request.getRealPath("/vboard/bbs_skin");

"/ <--웹 계정의 최상위 root를 말함

2010/02/16 22:58 2010/02/16 22:58
Posted
Filed under JSP, JAVA
package com.ubibada.common.util;
import java.io.File;
import java.io.FileFilter;
import java.io.FilenameFilter;
import java.util.ArrayList;
public class FileUtil {
 
 private ArrayList list=null;
 private File dir;
 private File[] dirlist;
 
 public FileUtil(){
  list = new ArrayList();
 }
 
 //directory filter
 private FileFilter getDirectoryFilter(){
  FileFilter fileFilter = new FileFilter() {
      public boolean accept(File file) {
          return file.isDirectory();
      }
  };
  return fileFilter;
 }
 
 //file filter
 private FilenameFilter getFileFilter(){
  FilenameFilter filter = new FilenameFilter() {
      public boolean accept(File dir, String name) {
          return !name.startsWith(".");
      }
  };
  return filter;
 }
 
 
 public ArrayList getdirlist(String path){
  dir = new File(path);
  conv_fileArry_to_list(dir.listFiles(getFileFilter()));
  return list;
 }
 
 public ArrayList getDirectoryList(String path){
  dir = new File(path);
  conv_fileArry_to_list(dir.listFiles(getDirectoryFilter()));
  return list;
 }
 
 private void conv_fileArry_to_list(File[] dirlist){
  this.list.clear();
  for (File flist : dirlist){
   this.list.add(flist.getName());
  }
 }
}
2010/02/11 09:46 2010/02/11 09:46
Posted
Filed under JSP, JAVA

servlet 인 int 되는 시점에서 공유 변수 설정을 하기 위해서
System.setProperty 를 이용해서 값을 저장후 서블릿 단에서  getProperty 를 통해서 호출 한다..
게시판 구현시 dbcp접속 servlet이 int되는 시점에서
dbType을 저장 하는데 활용 했음 .


setProperty

public static String setProperty(String key,
                                 String value)
Sets the system property indicated by the specified key.

First, if a security manager exists, its SecurityManager.checkPermission method is called with a PropertyPermission(key, "write") permission. This may result in a SecurityException being thrown. If no exception is thrown, the specified property is set to the given value.

Parameters:
key - the name of the system property.
value - the value of the system property.
Returns:
the previous value of the system property, or null if it did not have one.
Throws:
SecurityException - if a security manager exists and its checkPermission method doesn't allow setting of the specified property.
NullPointerException - if key or value is null.
IllegalArgumentException - if key is empty.
Since:
1.2
See Also:
getProperty(java.lang.String), getProperty(java.lang.String), getProperty(java.lang.String, java.lang.String), PropertyPermission, SecurityManager.checkPermission(java.security.Permission)


getProperty

public static String getProperty(String key,
                                 String def)
Gets the system property indicated by the specified key.

First, if there is a security manager, its checkPropertyAccess method is called with the key as its argument.

If there is no current set of system properties, a set of system properties is first created and initialized in the same manner as for the getProperties method.

Parameters:
key - the name of the system property.
def - a default value.
Returns:
the string value of the system property, or the default value if there is no property with that key.
Throws:
SecurityException - if a security manager exists and its checkPropertyAccess method doesn't allow access to the specified system property.
NullPointerException - if key is null.
IllegalArgumentException - if key is empty.
See Also:
setProperty(java.lang.String, java.lang.String), SecurityManager.checkPropertyAccess(java.lang.String), getProperties()


public static String getProperty(String key)
Gets the system property indicated by the specified key.

First, if there is a security manager, its checkPropertyAccess method is called with the key as its argument. This may result in a SecurityException.

If there is no current set of system properties, a set of system properties is first created and initialized in the same manner as for the getProperties method.

Parameters:
key - the name of the system property.
Returns:
the string value of the system property, or null if there is no property with that key.
Throws:
SecurityException - if a security manager exists and its checkPropertyAccess method doesn't allow access to the specified system property.
NullPointerException - if key is null.
IllegalArgumentException - if key is empty.
See Also:
setProperty(java.lang.String, java.lang.String), SecurityException, SecurityManager.checkPropertyAccess(java.lang.String), getProperties()

2010/02/10 21:55 2010/02/10 21:55
Posted
Filed under JSP, JAVA
[원문]http://lovelovewoo.springnote.com/pages/5055397
package board.util;
  • public class Paging {
  •  private int totalRows = 0;
     private int currentPage = 1;
     private int pageSize = 10;
     private int blockSize = 10;
     private int totalPages;
     private int totalBlocks;
     private int startPageNum;
     private int endPageNum;
     private int currentBlock;
  •  private String amp = "";
     
     // for design
     private String firstLink = "[<<]";
     private String firstOffLink = "";
     private String prevLink = "[<]";
     private String prevOffLink = "";
     private String nextLink = "[>]";
     private String nextOffLink = "";
     private String lastLink = "[>>]";
     private String lastOffLink = "";
     
     private String delimiter = "|";
     
     // current Page Wrapper
     private String preWrap = "<b>";
     private String postWrap = "</b>";
     
     private String linkPage = "";
     private String queryString = "";

  •  private int start,end;


  •  public int getStart() {
      return start;
     }
  •  public void setStart(int start) {
      this.start = start;
     }
  •  public int getEnd() {
      return end;
     }
  •  public void setEnd(int end) {
      this.end = end;
     }
  •  public String getFirstLink() {
      return firstLink;
     }
  •  public void setFirstLink(String firstLink) {
      this.firstLink = firstLink;
     }
  •  public String getFirstOffLink() {
      return firstOffLink;
     }
  •  public void setFirstOffLink(String firstOffLink) {
      this.firstOffLink = firstOffLink;
     }
  •  public String getPrevLink() {
      return prevLink;
     }
  •  public void setPrevLink(String prevLink) {
      this.prevLink = prevLink;
     }
  •  public String getPrevOffLink() {
      return prevOffLink;
     }
  •  public void setPrevOffLink(String prevOffLink) {
      this.prevOffLink = prevOffLink;
     }
  •  public String getNextLink() {
      return nextLink;
     }
  •  public void setNextLink(String nextLink) {
      this.nextLink = nextLink;
     }
  •  public String getNextOffLink() {
      return nextOffLink;
     }
  •  public void setNextOffLink(String nextOffLink) {
      this.nextOffLink = nextOffLink;
     }
  •  public String getLastLink() {
      return lastLink;
     }
  •  public void setLastLink(String lastLink) {
      this.lastLink = lastLink;
     }
  •  public String getLastOffLink() {
      return lastOffLink;
     }
  •  public void setLastOffLink(String lastOffLink) {
      this.lastOffLink = lastOffLink;
     }
  •  public String getDelimiter() {
      return delimiter;
     }
  •  public void setDelimiter(String delimiter) {
      this.delimiter = delimiter;
     }
  •  public String getPreWrap() {
      return preWrap;
     }
  •  public void setPreWrap(String preWrap) {
      this.preWrap = preWrap;
     }
  •  public String getPostWrap() {
      return postWrap;
     }
  •  public void setPostWrap(String postWrap) {
      this.postWrap = postWrap;
     }
  •  public String getLinkPage() {
      return linkPage;
     }
  •  public void setLinkPage(String linkPage) {
      this.linkPage = linkPage;
     }
  •  public String getQueryString() {
      return queryString;
     }
  •  public void setQueryString(String queryString) {
      this.queryString = queryString;
     }
  •  // result temp object
     public StringBuffer pageString = new StringBuffer();
     
     public Paging(int currentPage , int pageSize , int blockSize , int totalRows)
     {
      this.currentPage = currentPage;
      this.pageSize = pageSize;
      this.blockSize = blockSize;
      this.totalRows = totalRows;
     
      initialize();
     }
     
     public void initialize()
     {
      this.totalPages = (int)Math.ceil((double)this.totalRows / this.pageSize);
      this.totalBlocks = (int)Math.ceil((double)this.totalPages / this.blockSize);
      this.currentBlock = (int)Math.ceil((double)((this.currentPage - 1) / this.blockSize)) + 1;  
      this.startPageNum = ((this.currentBlock - 1) * this.pageSize) + 1;
      this.endPageNum = this.startPageNum + this.pageSize;
      this.start = (currentPage-1)*pageSize+1;
      this.end = start+pageSize-1;
     }
     
     public void prePrint()
     {
      // set first block link
      if(this.currentBlock > 1)
       pageString.append("<a href=\"" + this.linkPage + "?" + this.queryString + this.amp + "page=" + (((this.currentBlock - 2) * this.pageSize) + 1) + "\">" + this.firstLink + "</a> ");
      else
       pageString.append(this.firstOffLink + " ");
       
     
      // set prev page link
      if(this.currentPage > 1)
       pageString.append("<a href=\"" + this.linkPage + "?" + this.queryString + this.amp + "page=" + (this.currentPage  - 1) + "\">" + this.prevLink + "</a> ");
      else
       pageString.append(this.prevOffLink + " ");  
     }
     
     public void postPrint()
     {
      // set next page link
      if(this.currentPage < this.totalPages )
       pageString.append("<a href=\"" + this.linkPage + "?" + this.queryString + this.amp + "page=" + (this.currentPage + 1) + "\">" + this.nextLink + "</a> ");
      else
       pageString.append(this.nextOffLink + " ");
     
      // set last page link
      if(this.currentBlock < this.totalBlocks)
       pageString.append("<a href=\"" + this.linkPage + "?" + this.queryString + this.amp + "page=" + ((this.currentBlock * this.pageSize) + 1) + "\">" + this.lastLink + "</a> ");
      else
       pageString.append(this.lastOffLink);
     }
     
     public void printList()
     {
      for(int i = startPageNum ; i <= endPageNum ; i++)
      {
       if(i > this.totalPages || i == endPageNum)
        break;
       else if(i > startPageNum)
        pageString.append(this.delimiter);
       
       if(i == this.currentPage)  
        pageString.append(" " + this.preWrap + i +  this.postWrap + " ");
       else
        pageString.append(" <a href=\"" + this.linkPage + "?" + this.queryString + this.amp + "page=" + i + "\">" + i + "</a> ");
      }
     }
     
     public String print()
     {
      // set amp if already to set up queryString property
      if(!this.queryString.equals(""))
       this.amp = "&";
     
      if(this.totalPages > 1)
      {
       this.prePrint();
       this.printList();
       this.postPrint();
      }
     
      return(pageString.toString());
     }
     
     /**
      * @param args
      */
     /*
     public static void main(String[] args) {
     
      // TODO Auto-generated method stub
      Pagination page = new Pagination(1 , 10, 10 , 11);
      page.linkPage = "pagenum.jsp";
      page.queryString = "param1=test&param2=test2";
     
      // for design
      page.firstLink = "<img src=\"/first.gif\">";
      page.prevLink = "<img src=\"/prev.gif\">";
      page.nextLink = "<img src=\"/next.gif\">";
      page.lastLink = "<img src=\"/last.gif\">";
     
      page.firstOffLink = "[<<]";
      page.prevOffLink = "[<]";
      page.nextOffLink = "[>]";
      page.lastOffLink = "[>>]";
     
      page.delimiter = "||";
     
     
      //print
      System.out.println(page.print());
     }
     */
  • }
  • 2010/02/10 13:57 2010/02/10 13:57
    Posted
    Filed under JSP, JAVA
    <html:option value="<bean:write property='best' name='supplier'/>"><bean:write property="supplierName" name="supplier"/></html:option>

    option 테그에 value값을 넣기 위해서 bean:write를 사용 하게 되면, 값이 그대로 들어 가게 된다.  value=""에는 어떤 테그도 들어 갈 수 없다..
    그럼으로, <bean:define>테그를 이용하여 변수를 생성 하여 값을 넣어 주면 된다.

    <html:select property="homeContext">
    <html:option value=""><bean:message key="home.context" /></html:option>
    <logic:iterate name="supplierlst" id="supplier" scope="request">
    <bean:define id="supplierValue" ><bean:write property="best" name="supplier"/></bean:define>
    <html:option value="<%=supplierValue%>"><bean:write property="supplierName" name="supplier"/>(<bean:write property="best" name="supplier"/>)</html:option>
    </logic:iterate>
    </html:select>


    [document]http://struts.apache.org/1.x/struts-taglib/tagreference.html#bean:define

    <bean:define>

    Define a scripting variable based on the value(s) of the specified bean property.

    Create a new attribute (in the scope specified by the toScope property, if any), and a corresponding scripting variable, both of which are named by the value of the id attribute. The corresponding value to which this new attribute (and scripting variable) is set are specified via use of exactly one of the following approaches (trying to use more than one will result in a JspException being thrown):

    • Specify a name attribute (plus optional property and scope attributes) - The created attribute and scripting variable will be of the type of the retrieved JavaBean property, unless it is a Java primitive type, in which case it will be wrapped in the appropriate wrapper class (i.e. int is wrapped by java.lang.Integer).
    • Specify a value attribute - The created attribute and scripting variable will be of type java.lang.String, set to the value of this attribute.
    • Specify nested body content - The created attribute and scripting variable will be of type java.lang.String, set to the value of the nested body content.

    If a problem occurs while retrieving the specified bean property, a request time exception will be thrown.

    The <bean:define> tag differs from <jsp:useBean> in several ways, including:

    • Unconditionally creates (or replaces) a bean under the specified identifier.
    • Can create a bean with the value returned by a property getter of a different bean (including properties referenced with a nested and/or indexed property name).
    • Can create a bean whose contents is a literal string (or the result of a runtime expression) specified by the value attribute.
    • Does not support nested content (such as <jsp:setProperty> tags) that are only executed if a bean was actually created.

    USAGE NOTE - There is a restriction in the JSP 1.1 Specification that disallows using the same value for an id attribute more than once in a single JSP page. Therefore, you will not be able to use <bean:define> for the same bean name more than once in a single page.

    USAGE NOTE - If you use another tag to create the body content (e.g. bean:write), that tag must return a non-empty String. An empty String equates to an empty body or a null String, and a new scripting variable cannot be defined as null. Your bean must return a non-empty String, or the define tag must be wrapped within a logic tag to test for an empty or null value.

    USAGE NOTE - You cannot use bean:define to instantiate a DynaActionForm (type="org.apache.struts.action.DynaActionForm") with the properties specified in the struts-config. The mechanics of creating the dyna-properties is complex and cannot be handled by a no-argument constructor. If you need to create an ActionForm this way, you must use a conventional ActionForm.

    See the Bean Developer's Guide section on bean creation for more information about these differences, as well as alternative approaches to introducing beans into a JSP page.

    Can contain: JSP

    Attributes

    Name Description Type
    id*

    Specifies the name of the scripting variable (and associated page scope attribute) that will be made available with the value of the specified property.

    String
    name

    Specifies the attribute name of the bean whose property is accessed to define a new page scope attribute (if property is also specified) or the attribute name of the bean that is duplicated with the new reference created by this tag (if property is not also specified). This attribute is required unless you specify a value attribute or nested body content.

    String
    property

    Specifies the name of the property to be accessed on the bean specified by name. This value may be a simple, indexed, or nested property reference expression. If not specified, the bean identified by name is given a new reference identified by id.

    String
    scope

    Specifies the variable scope searched to retrieve the bean specified by name. If not specified, the default rules applied by PageContext.findAttribute() are applied.

    String
    toScope

    Specifies the variable scope into which the newly defined bean will be created. If not specified, the bean will be created in page scope.

    String
    type

    Specifies the fully qualified class name of the value to be exposed as the id attribute.

    String
    value

    The java.lang.String value to which the exposed bean should be set. This attribute is required unless you specify the name attribute or nested body content.

    2010/02/09 16:36 2010/02/09 16:36
    Posted
    Filed under JSP, JAVA
    C언어와는 달리, 자바에서의 문자열 바꾸기 Substitution 는 아주 쉽습니다.

    여기서 소개하는 자바의 문자열 치환 메소드(함수)들은, "Search and Replace" 또는 "Find and Replace" 개념입니다. 텍스트에디터의 문자열 바꾸기처럼, 지정한 문자열을 기존의 문자열 속에서 자동으로 찾아서 바꿉니다. 대부분의 경우에는 이것을 사용하면 됩니다.


    문자열 치환(Replace) 예제


    파일명: Foo.java
    public class Foo {
      public static void main(String[] args) {

        String s  = "봉숭아 학당! 봉숭아 학당!"; // 원본 문자열
        String s2;

        System.out.println("원본:    " + s);
        System.out.println(); // 줄바꿈


        // (1)
        s2 = s.replace("숭아", "맹구");
        System.out.println("치환(1): " + s2); // 출력 결과: 봉맹구 학당! 봉맹구 학당!

        // (2)
        s2 = s.replaceFirst("숭아", "맹구");
        System.out.println("치환(2): " + s2); // 출력 결과: 봉맹구 학당! 봉숭아 학당!

        // (3)
        s2 = s.replaceAll("숭아", "맹구");
        System.out.println("치환(3): " + s2); // 출력 결과: 봉맹구 학당! 봉맹구 학당!

      }
    }


    public String replace(CharSequence target, CharSequence replacement)
    이것은 일치되는 모든 문자열을 바꿉니다. 원본 문자열에 "숭아"가 2개 있는데 모두 "맹구"로 치환되었습니다. (CharSequence 가 아닌 String 도 사용 가능합니다.)


    public String replaceFirst(String regex, String replacement)
    이것은 첫번째로 일치되는 문자열만 바꿉니다. 첫 번째 "숭아"만 "맹구"로 치환되었습니다. 문자열 대신에, 정규식(regex)을 지정할 수도 있습니다.


    public String replaceAll(String regex, String replacement)
    맨 처음의 replace() 와 같이, 일치되는 모든 문자열을 바꿉니다. replace()와 다른 점은, 정규식/정규표현식(Regular Expressions; Regex)을 사용할 수 있다는 것입니다.


    ▶▶ Java/자바/정규식] 대소문자 구분 없이 문자열 바꾸기/치환; Replace String Ignore Case Regex

    ▶▶ Java/자바] 백슬래쉬(\; ₩) 문자 바꾸기, 문자열/정규식에 백슬래시 자체 표현 방법; Backslash

    ▶▶ Java/자바] 문자열 삭제, 일부 문자열만 지우기; Remove, Delete String

    ▶▶ Java/자바] 문자열 속에서 문자열 검색, 문자 찾기; Find Sub-String in a String

    [원문]☞ 자바(Java)
    2010/02/08 17:32 2010/02/08 17:32